
First Impression
The overall craftsmanship and build quality of the XTR VF LED bulb assembly is very high class. It doesn’t feel cheap or low-grade. The bronze-like anodized finish is pretty cool looking. The braided wire covers are a nice touch however their a little on the stiff side. This may or may not be an issue when someone is trying to conform the wiring around the engine bay or tuck them away as they have a tendency to poke out in a straight angle. (i’m being picky)
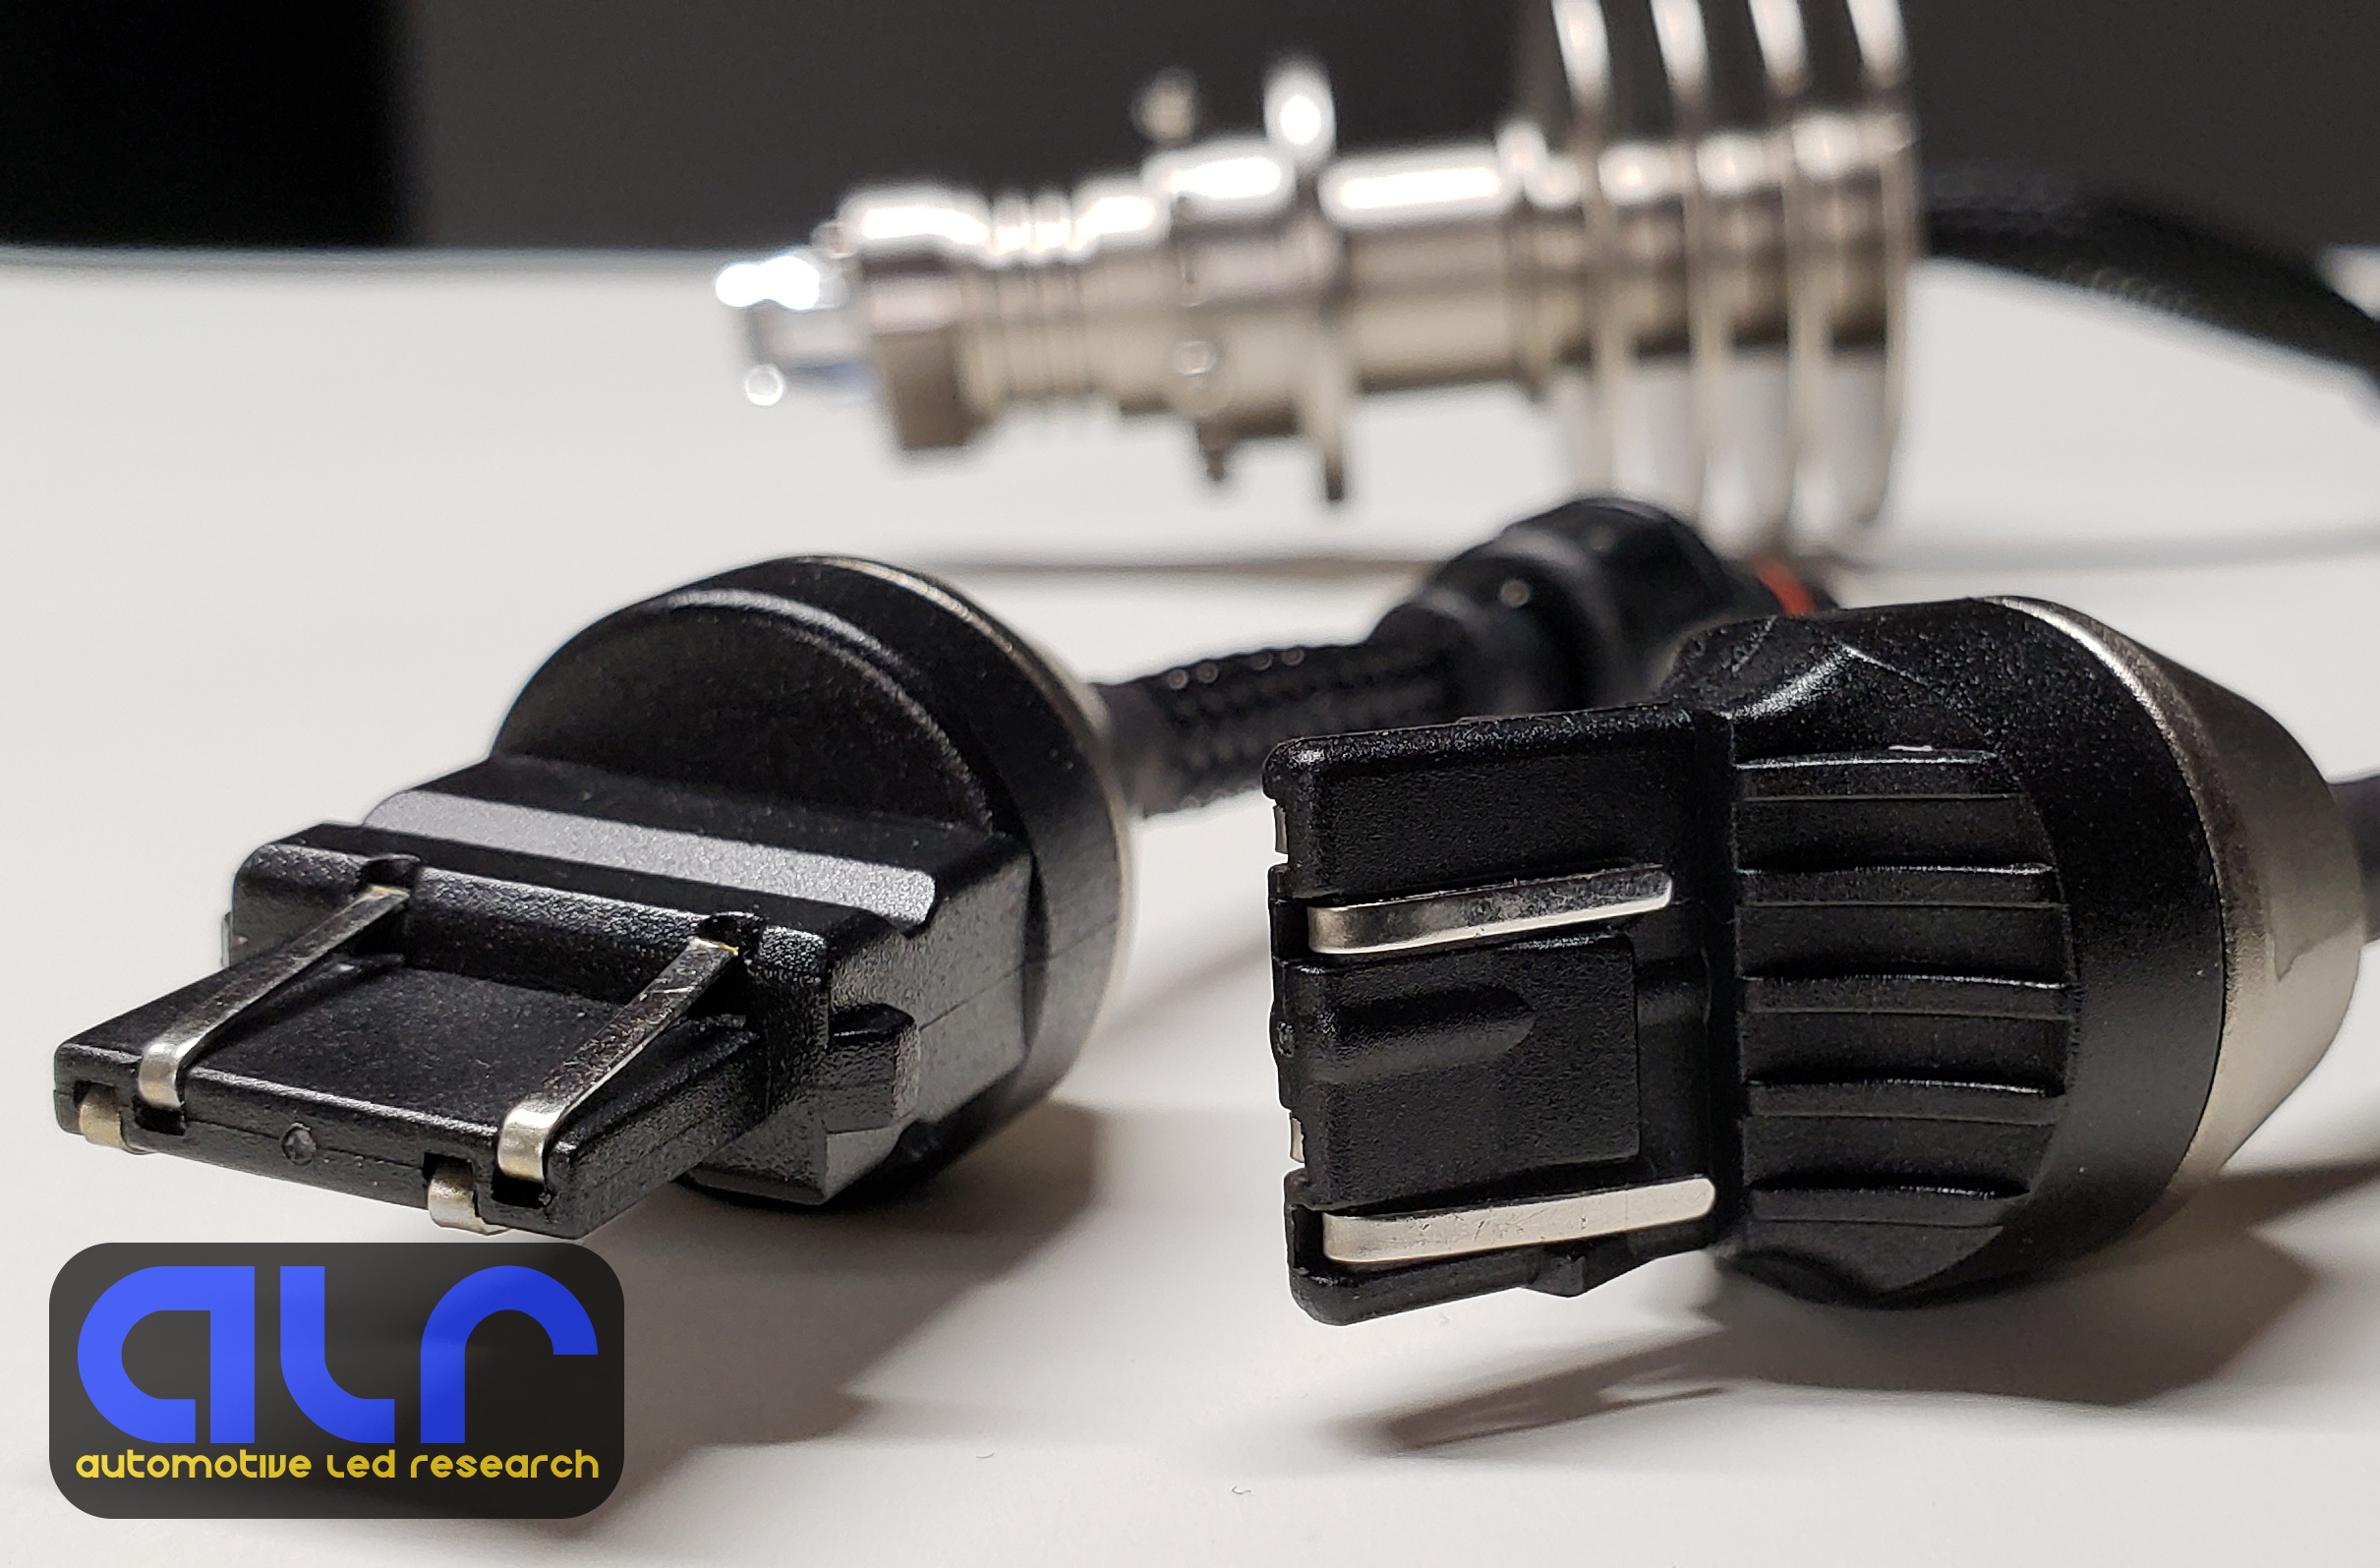
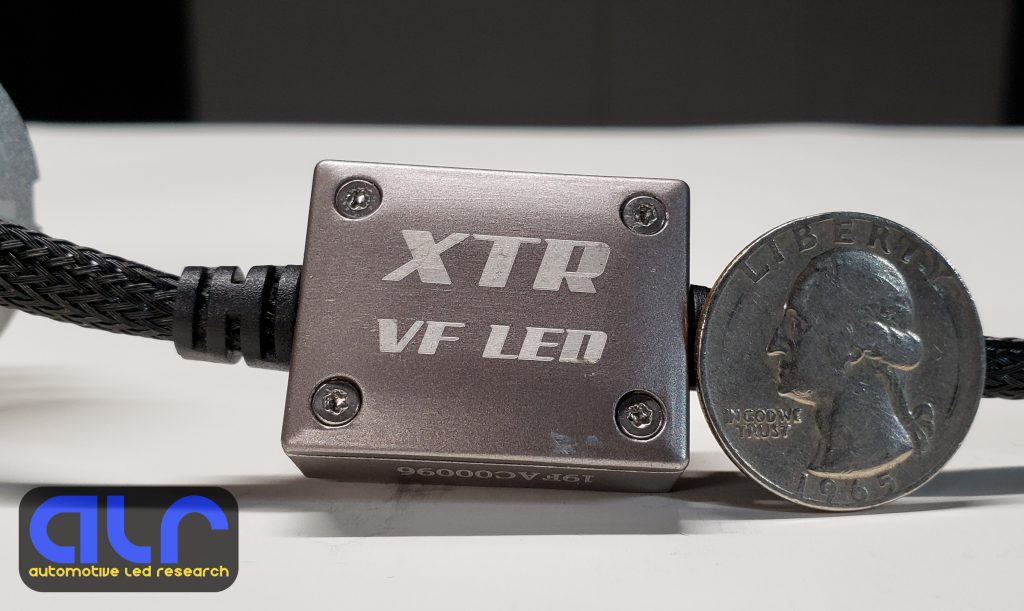
Looking at the bulb adapters I’m glad to see that the wire contacts for the socket are not thin paper clip wires that are found in pretty much all cheap LED bulbs. The wide and flat wire contacts are definitely a nice upgraded touch, even though this detail is often unnoticed. The external driver module is very small and pretty much weightless which is great for installation flexibility. Who wants a bulky heavy driver hanging that you need to secure somewhere in the engine compartment?
Bulb focus adjustability
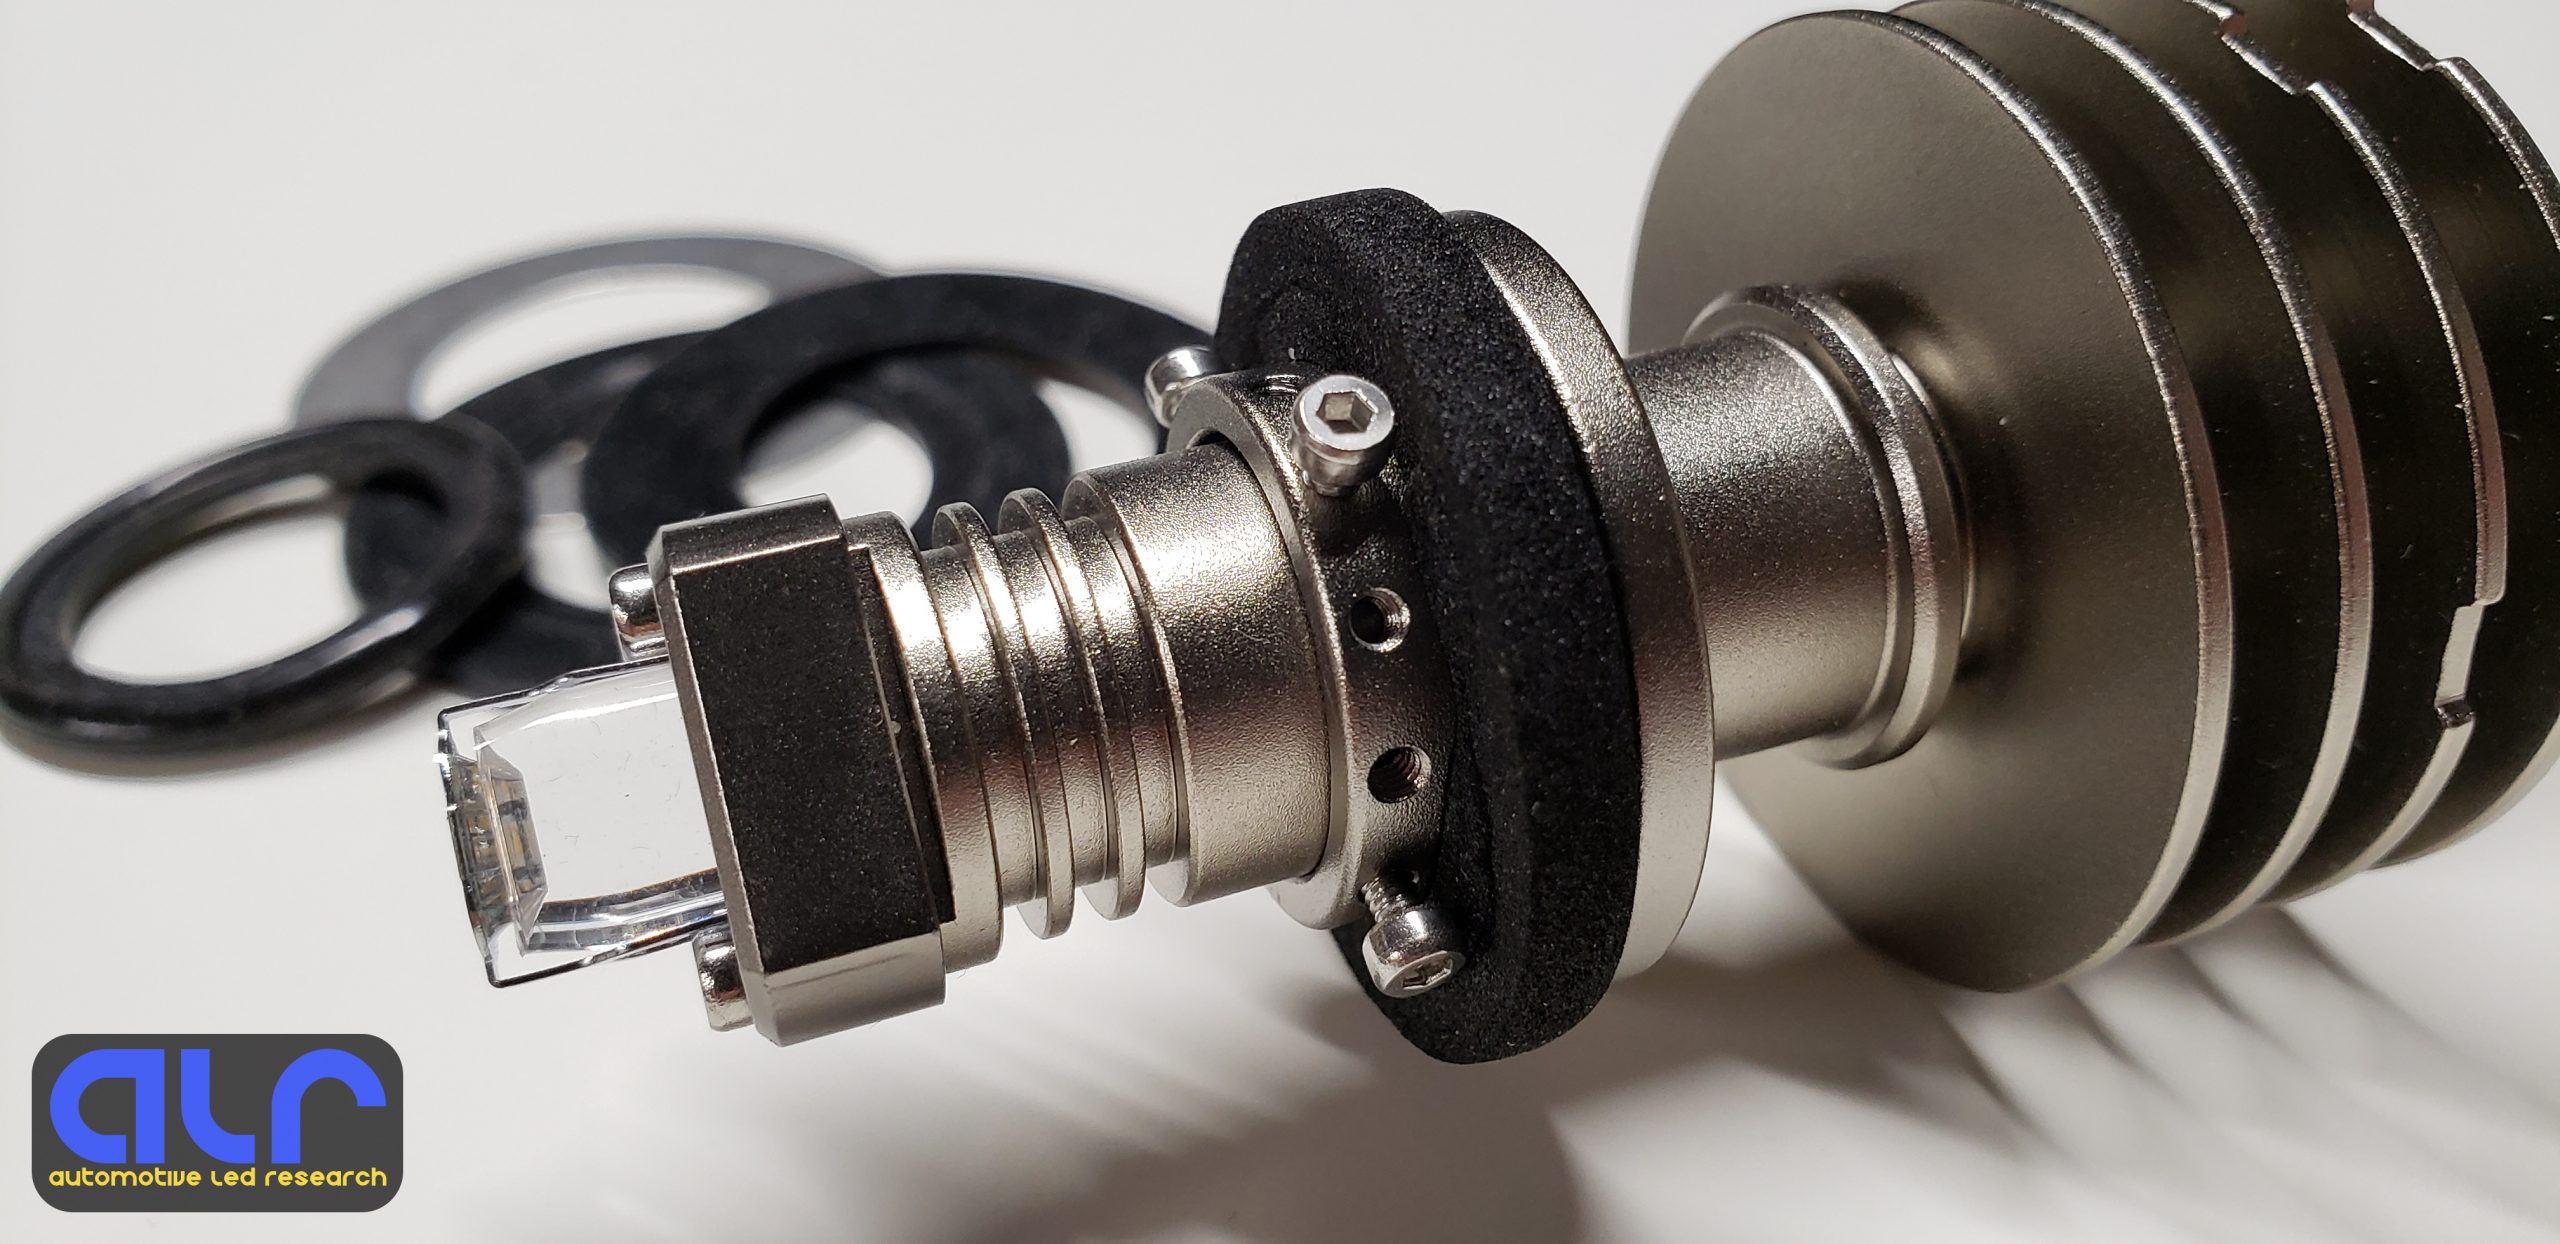
The alignment of the virtual filament (VF) to the incandescent filament is a pretty straightforward process. It really is a matter of eye-balling the filament position with both bulbs side by side. Unfortunately there are no adjustment markings on the bulb body which would make repeating the adjustment to the second bulb quick and easy. The user manual provides an illustration of where to visually align the VF with respect to the filament height on your original bulb assembly.  It also illustrates how the screws on the VF collar should match to the tabs on the original bulb socket. This is so that when you go to lock the bulb in place the rotation of the VF is perfectly matched to the filament. Rotation is important because many lamps don’t all position the filaments the same. Most filaments stand straight up/down but many also stand at an angle. If the VF collar is not adjusted properly to match the original bulb and socket then the optical focus will suffer.
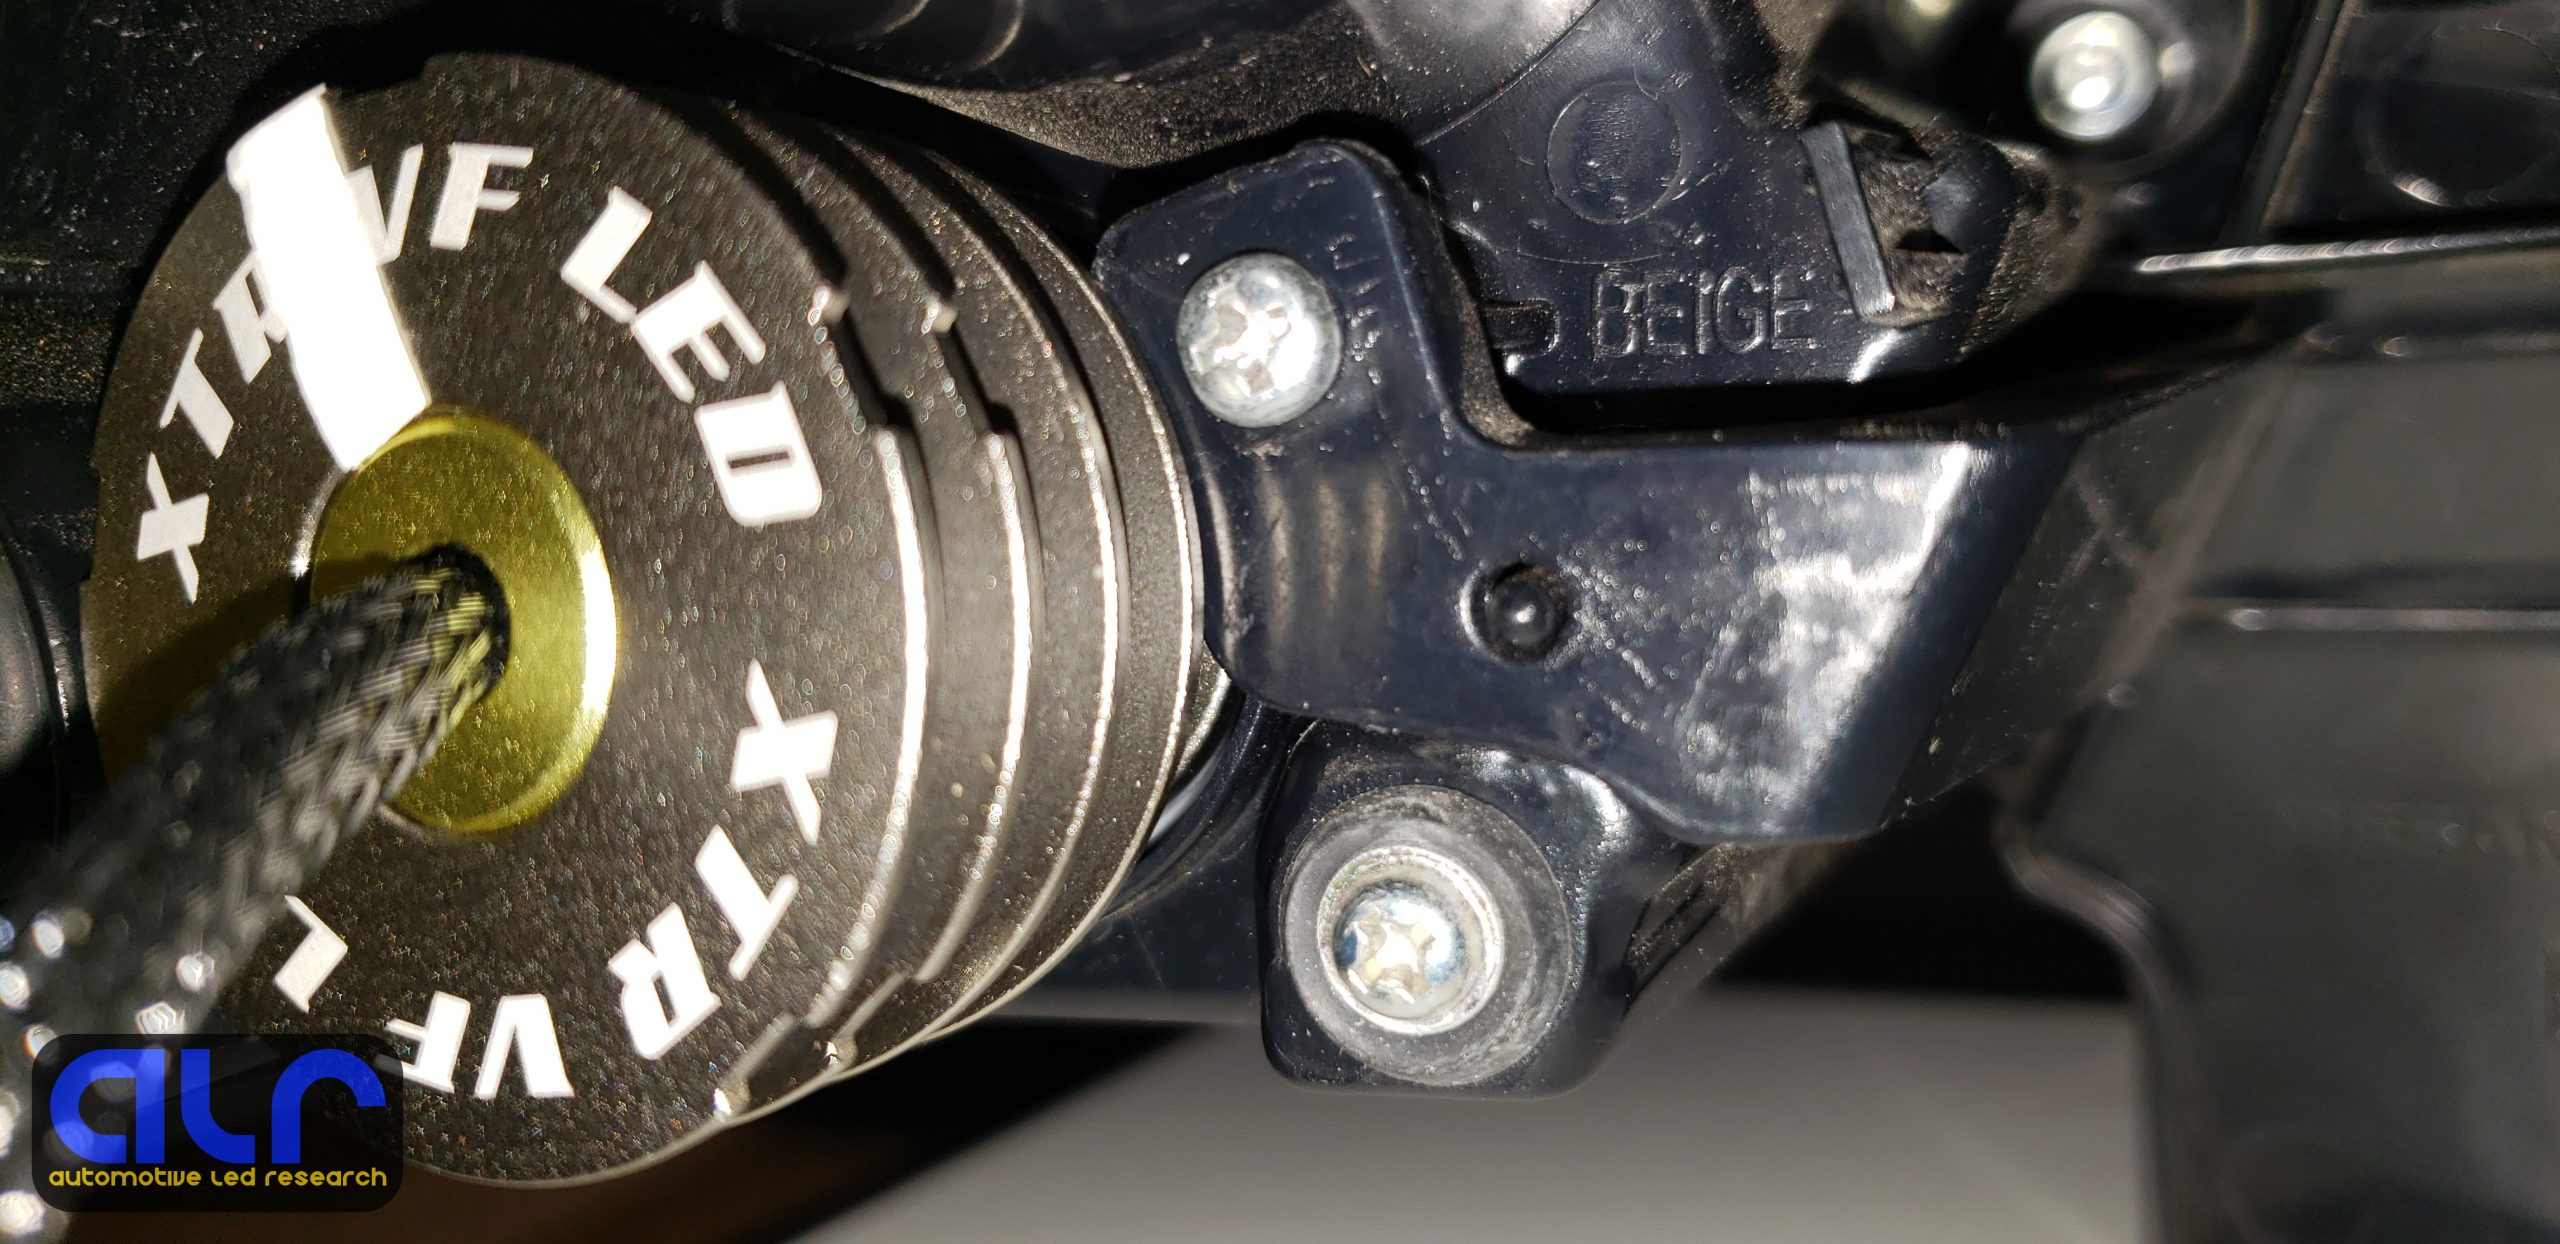
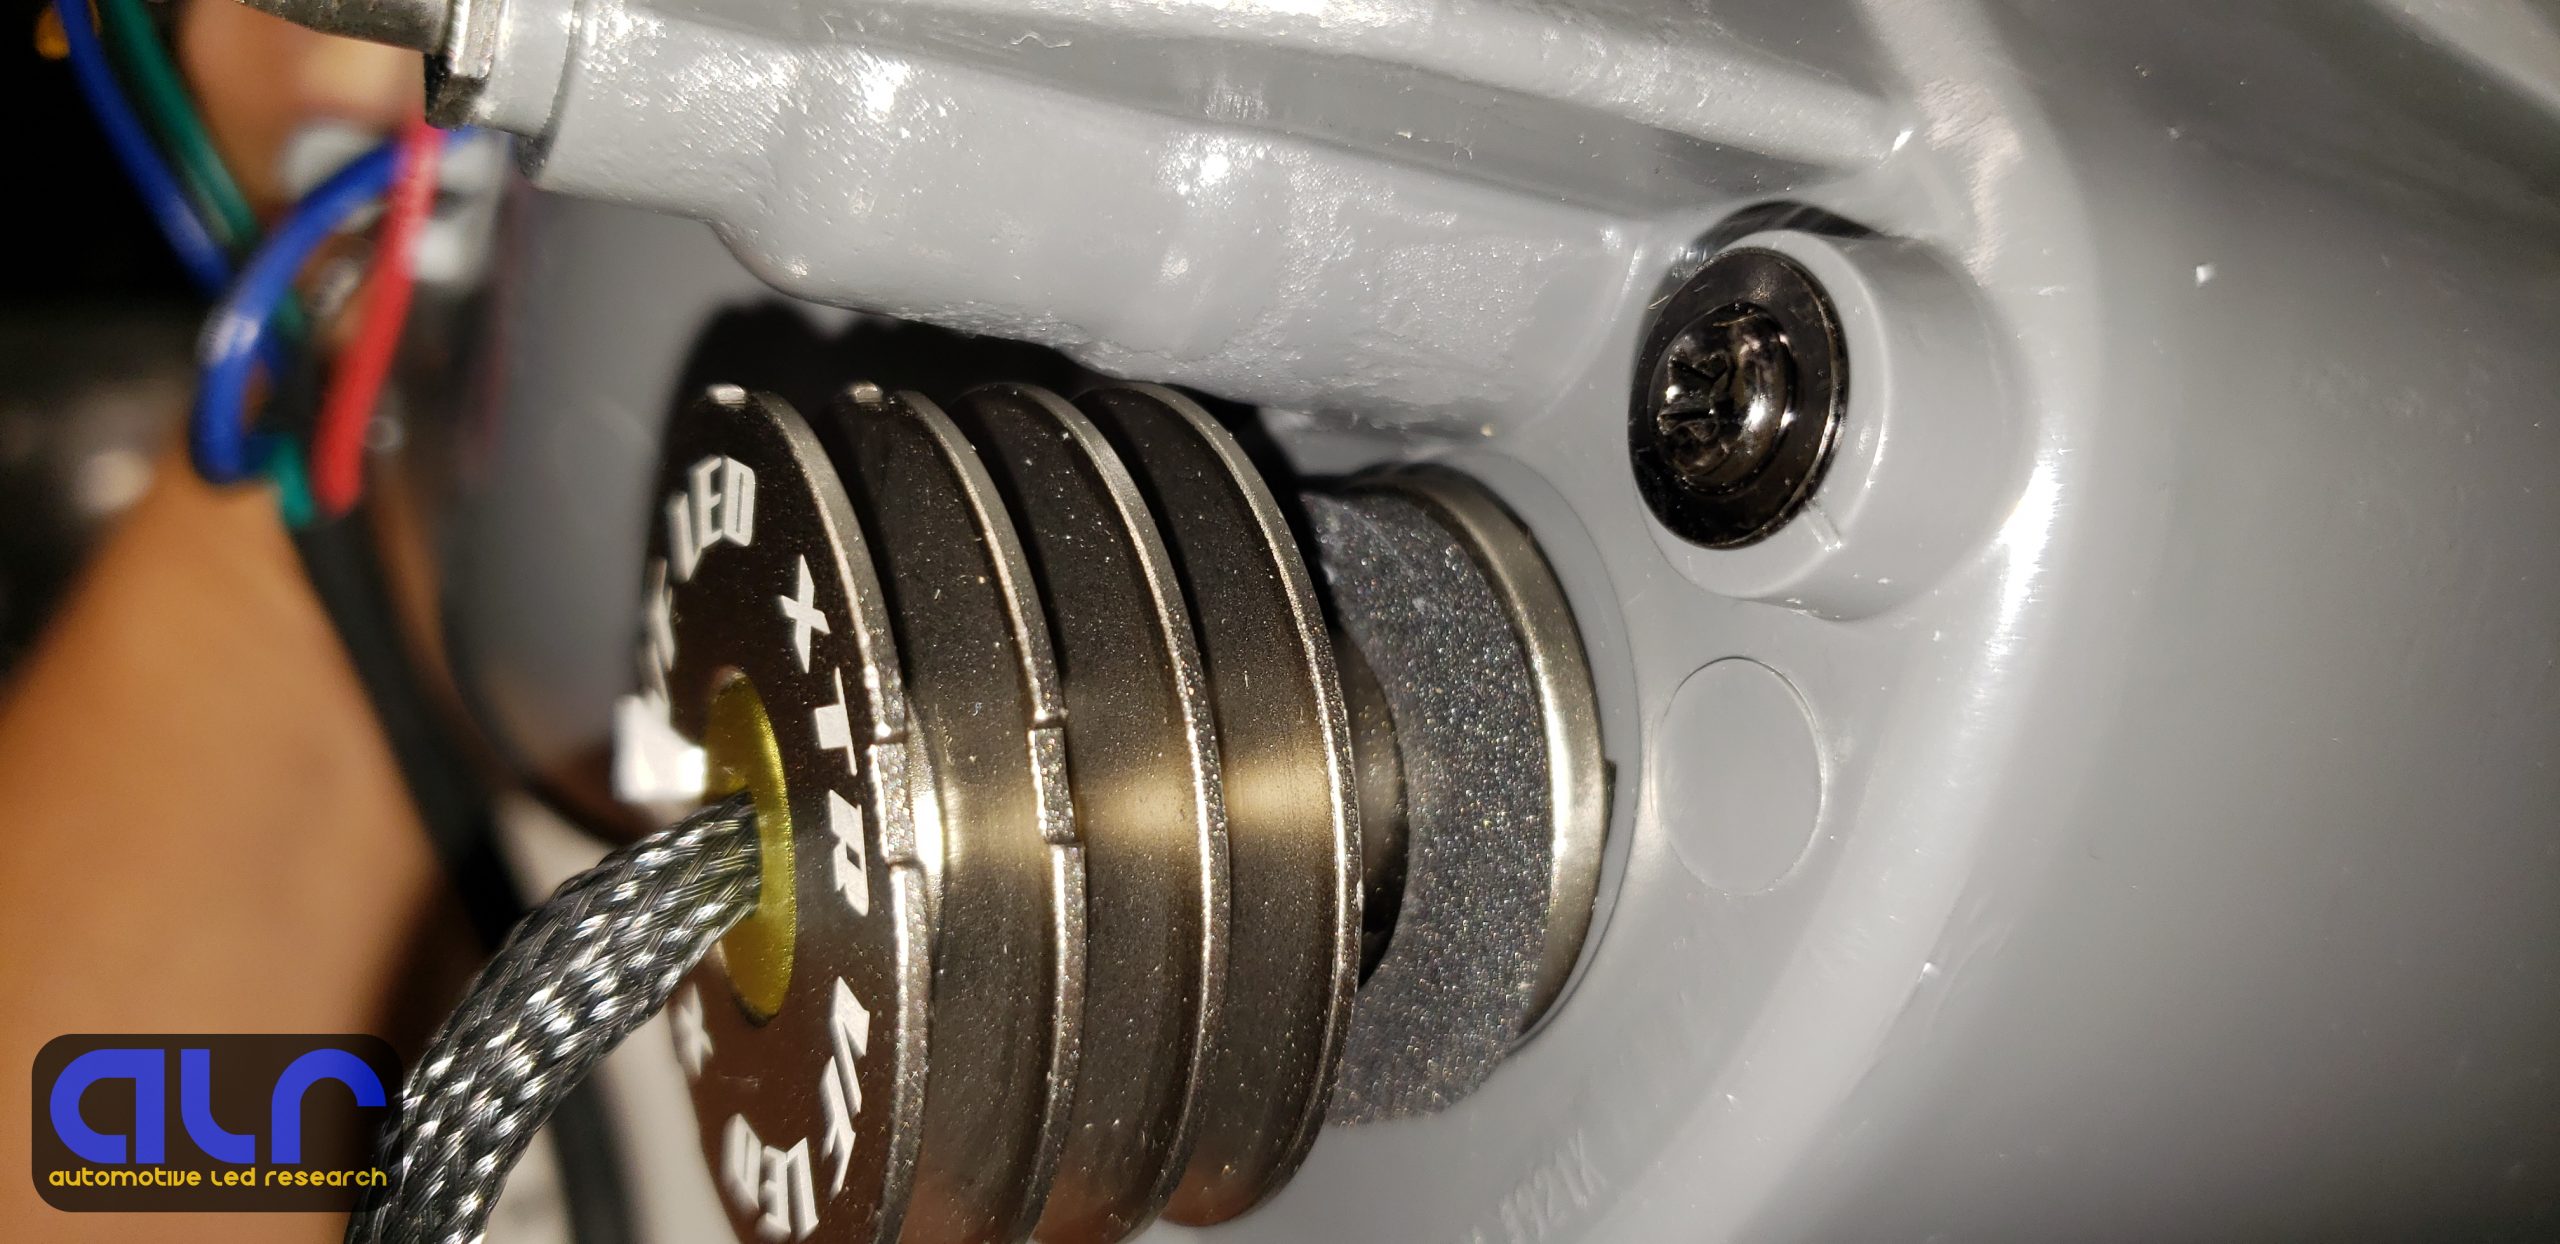
Once the VF height and rotation are set then the Allen screws should be fastened down. I found that the collar can easily become crooked, which can also affect the optical focus. Be sure that the collar is sitting straight. Tightening the screws slowly in a criss cross pattern (like torquing wheel lug nuts) worked best to secure the collar level and uniform.
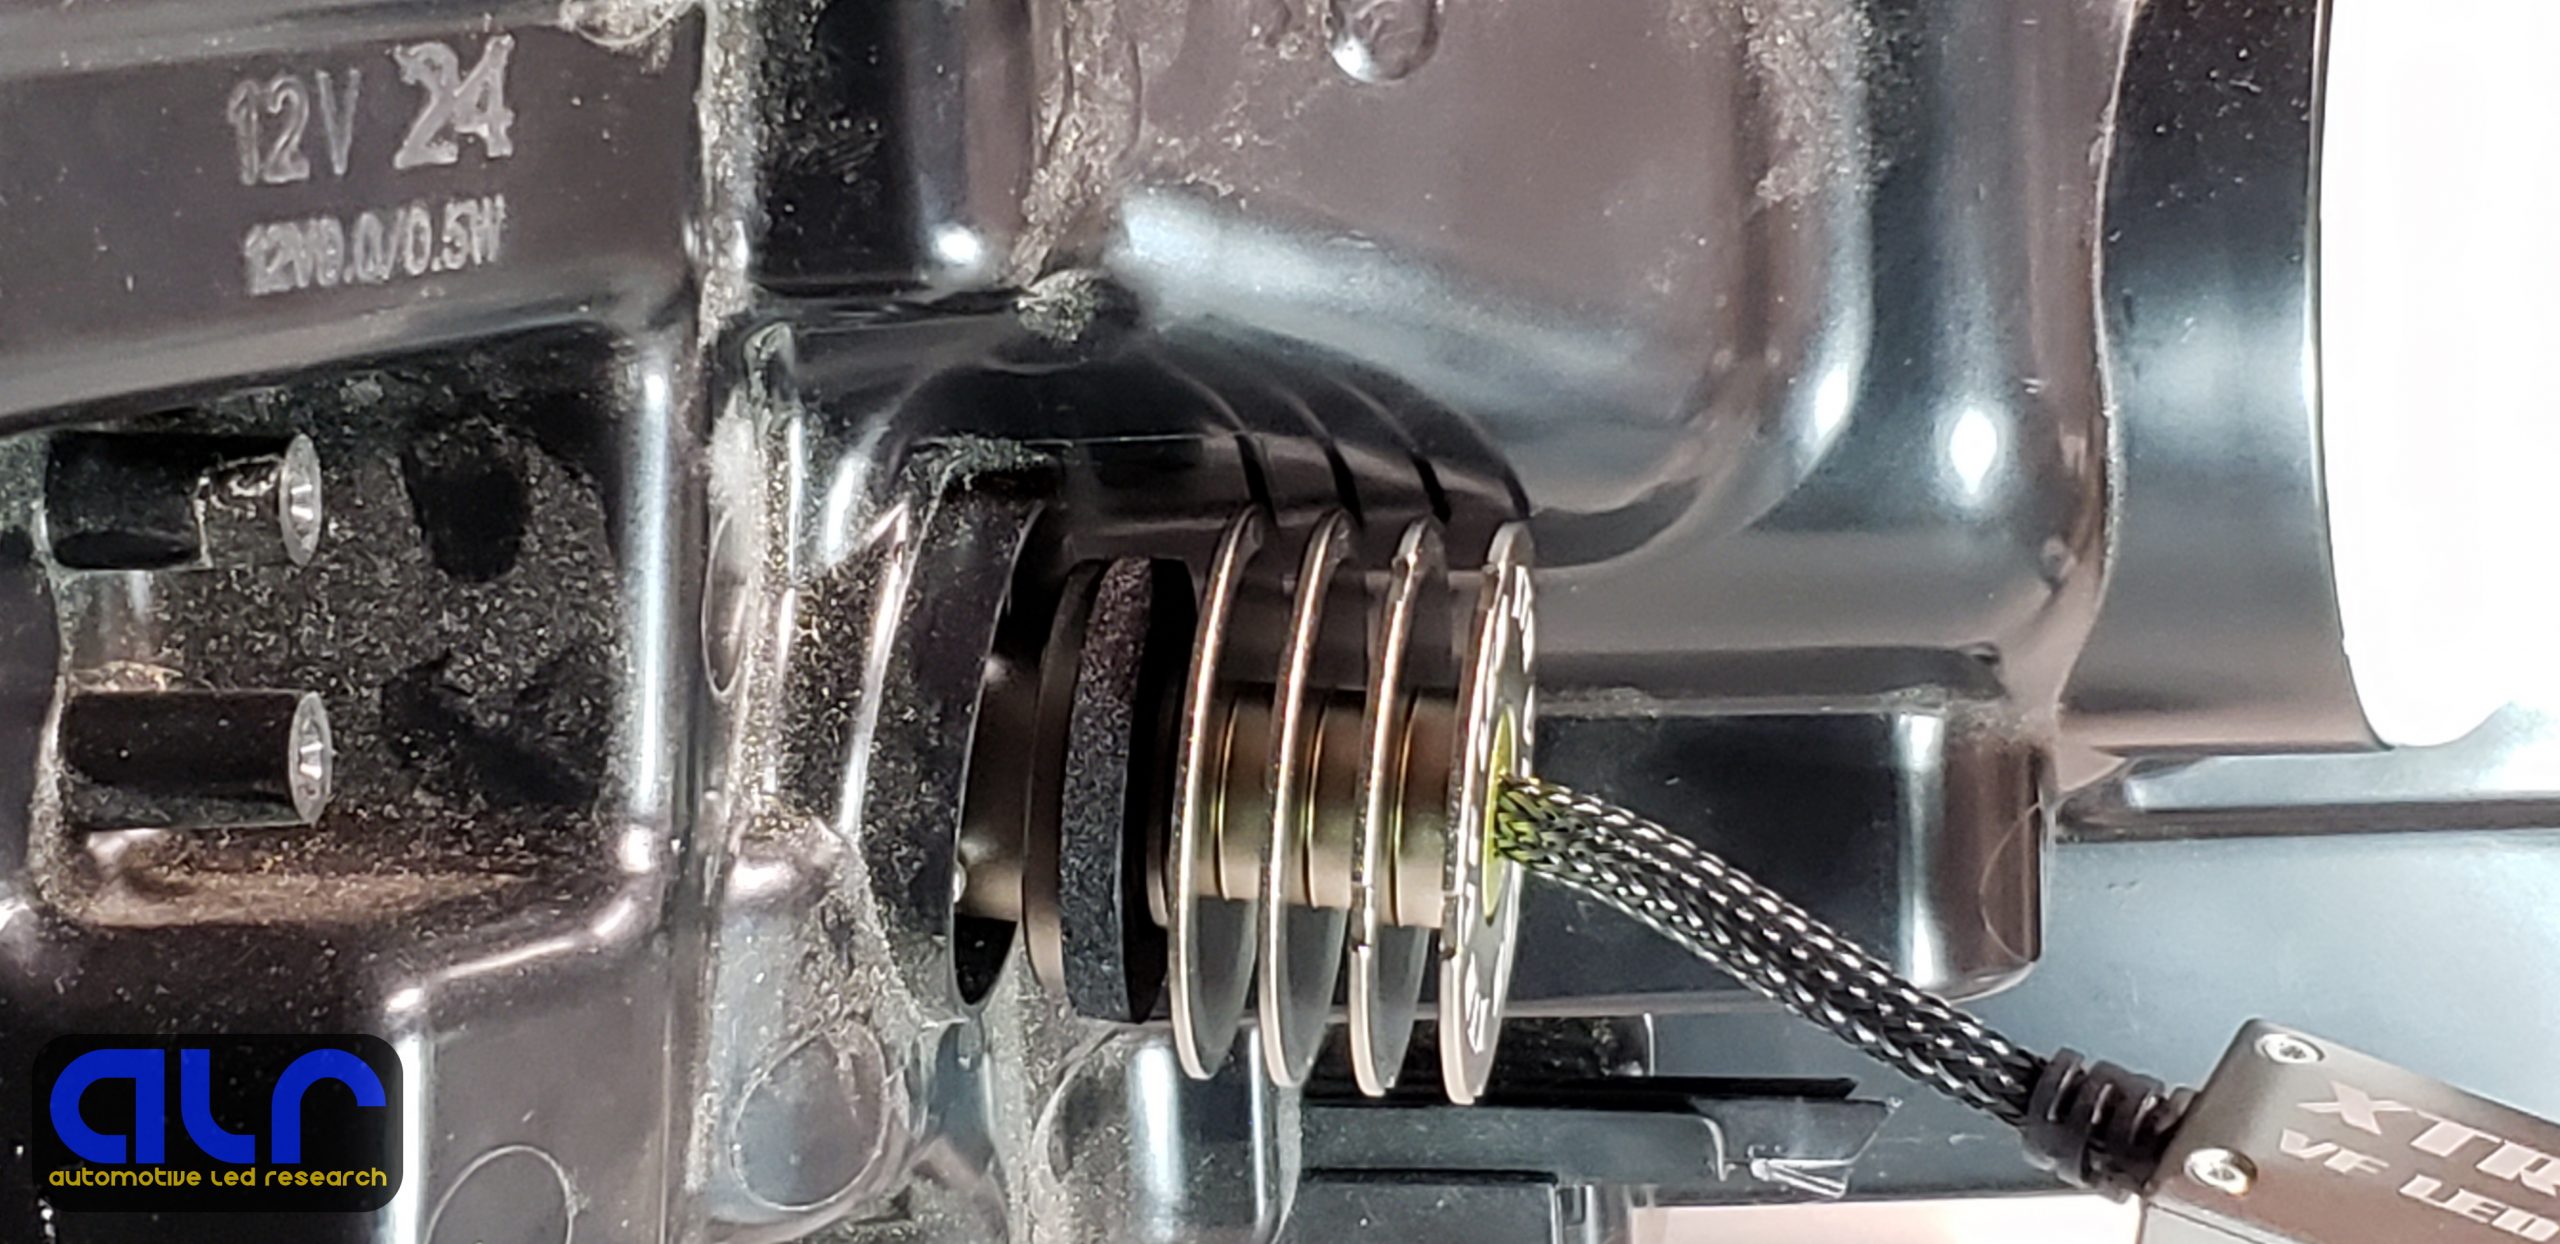
The bulb kit comes with various sized rubber washers and a few metal ones for securing and sealing the bulb when you lock it in place. Using the original rubber washers off your stock bulb socket work better but often the fit can be really tight. If you find it extremely difficult to twist the bulb in place, don’t force it. It either means you don’t have the correct tab configuration or the washer is too thick. There is a dense foam washer that is attached to the body out of the box. I like using this one the best since its easily compressible while still keeping the bulb fitted tight. This isn’t always the case with all lamps so you may have to experiment for your situation.
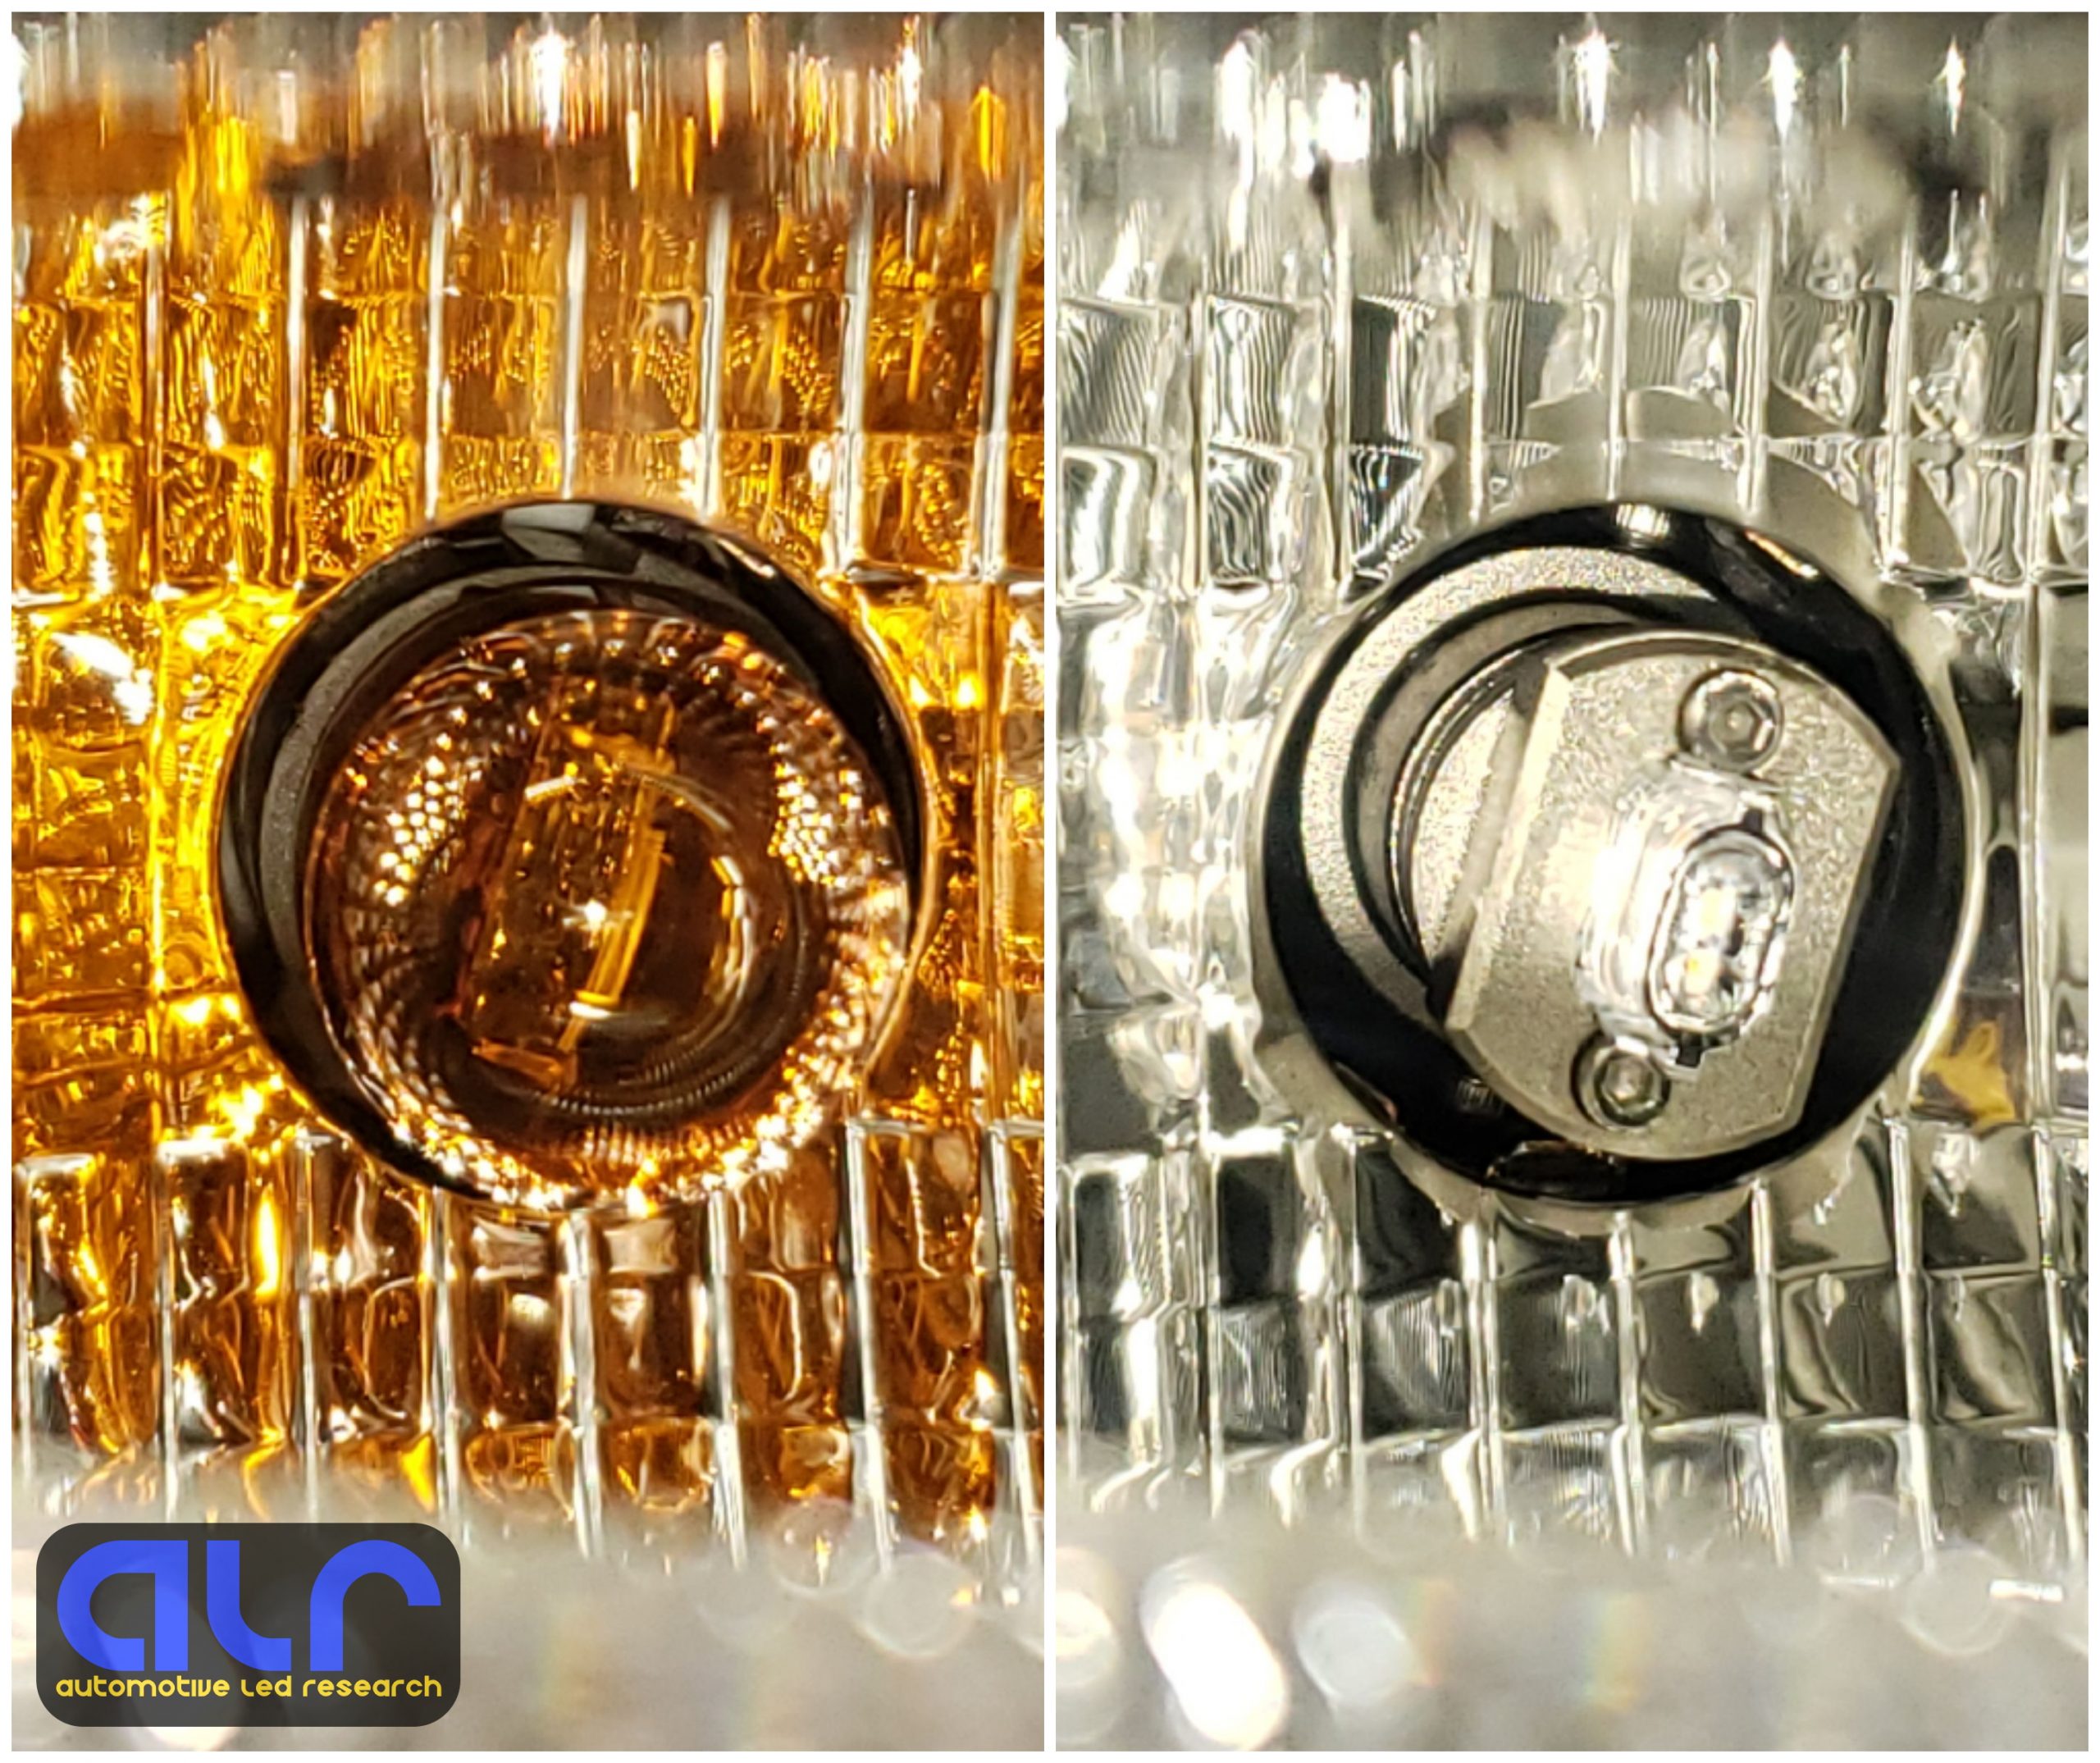
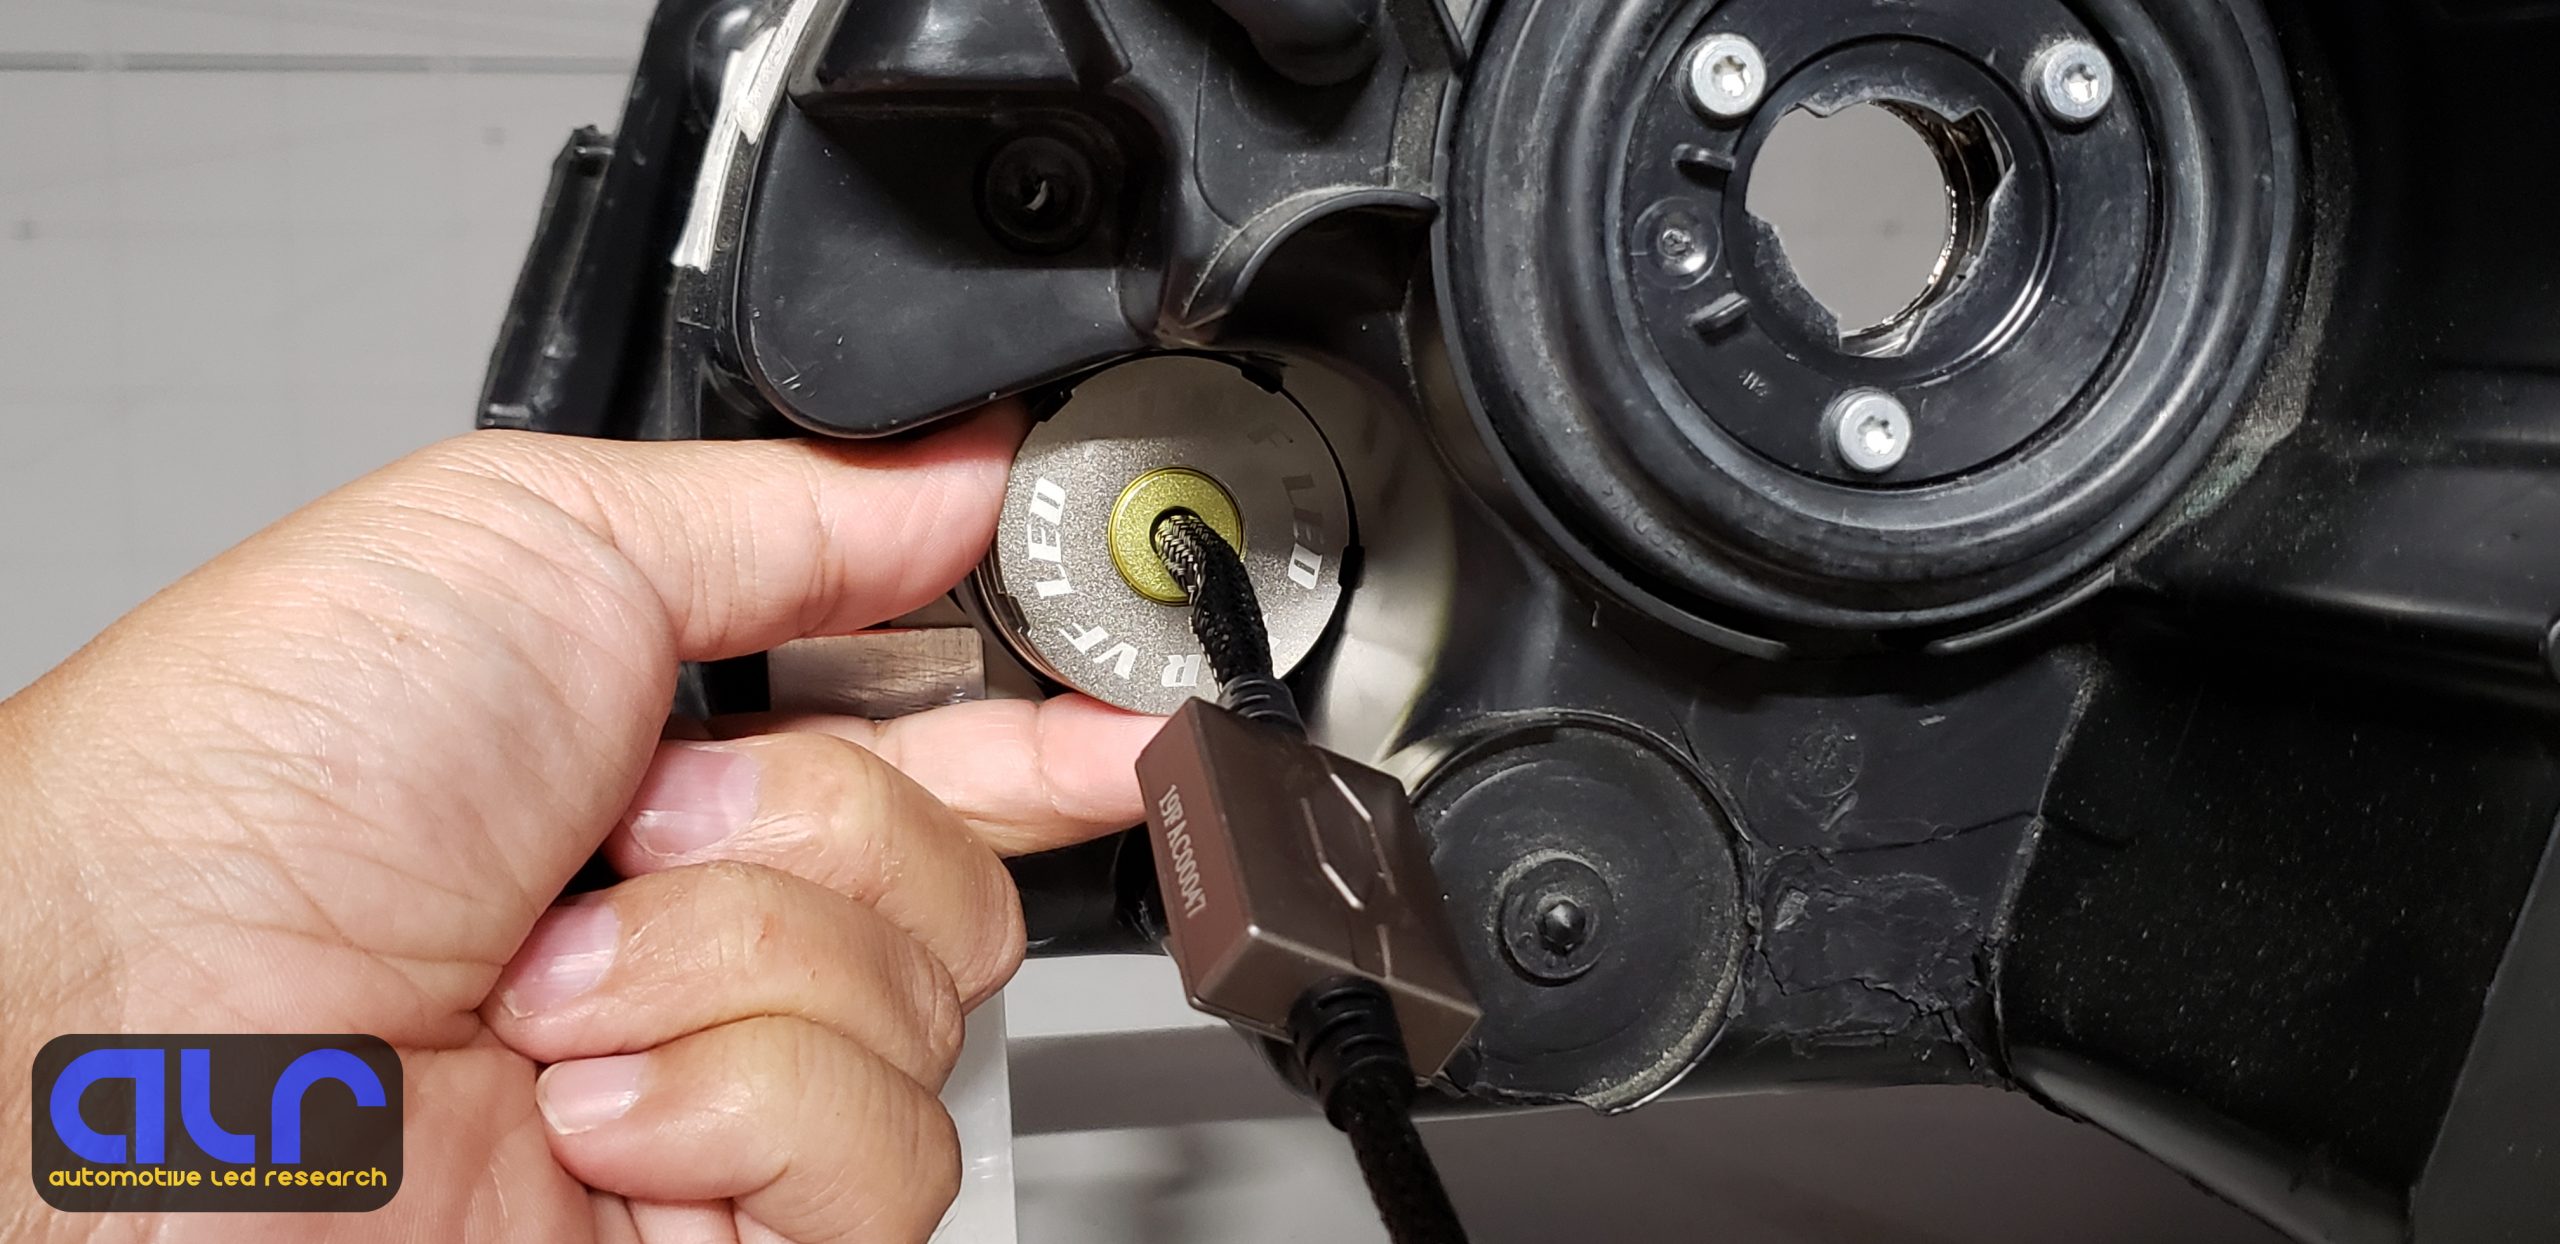
Assuming that you’ve installed the screws correctly and everything is aligned properly, once you’ve locked the bulb in place, you’ll need to validate that the VF is set at the correct rotation. This can be done in one of two ways: looking through the front of the lens or at the rear of the bulb. If your lamp has fluted or pillowed lenses than this will make visual inspection through the front difficult and viewing from the rear would be necessary. For these type of lamps I went and put a thin piece of tape on the backside before installing to help identify where the VF is pointed. If your lamp has a clear front lens then confirmation is obviously much easier. I will admit, this rotation adjustment can be tedious but is necessary. Below is a 19-20 Ram 1500 headlamp with the VF angled just like the 7444 incandescent bulb.
Fitment/Compatibility
It wasn’t until I started fitting the bulbs to my test lamps that I realized there was a problem with the Allen screws. They were too long which was preventing the bulb to fit inside the socket key hole. A quick email to TRS and I was supplied with shorter screws which pretty much solved that issue. Even though the shorter screws worked better in the majority of the lamps there was still some fitment issues (as I will explain further in a moment).
Specific lamps originally designated to be a part of my testing had to be excluded because they are not compatible with the XTR VF LED for the turn signal function.
Those lamps would include:
-
- 11-19 Dodge Grand Caravan headlamp *partial
- 17-19 Nissan Rogue headlamp
- 17-19 Nissan Rogue tail lamp
- 15-17 Ford F150 headlamp
- 11-16 Chevy Cruze tail lamp
I noted the Grand Caravan headlamp as partial because although the XTR VF LED did fit in the rear housing cavity, the fit was so tight that even with the headlamp off the vehicle, locking the bulb in place was extremely difficult because I could only use two finger tips to pinch half of the body. This would be nearly impossible to do on the vehicle around the engine bay framing and with limited arm leverage.
The Ford F150 was a case where the allen screws were simply too long, even with the new shorter versions. I went a step further and filed the screws down as short as I could in hopes this would resolve the problem. It did not. The screws will not clear the tab openings on the headlamp.
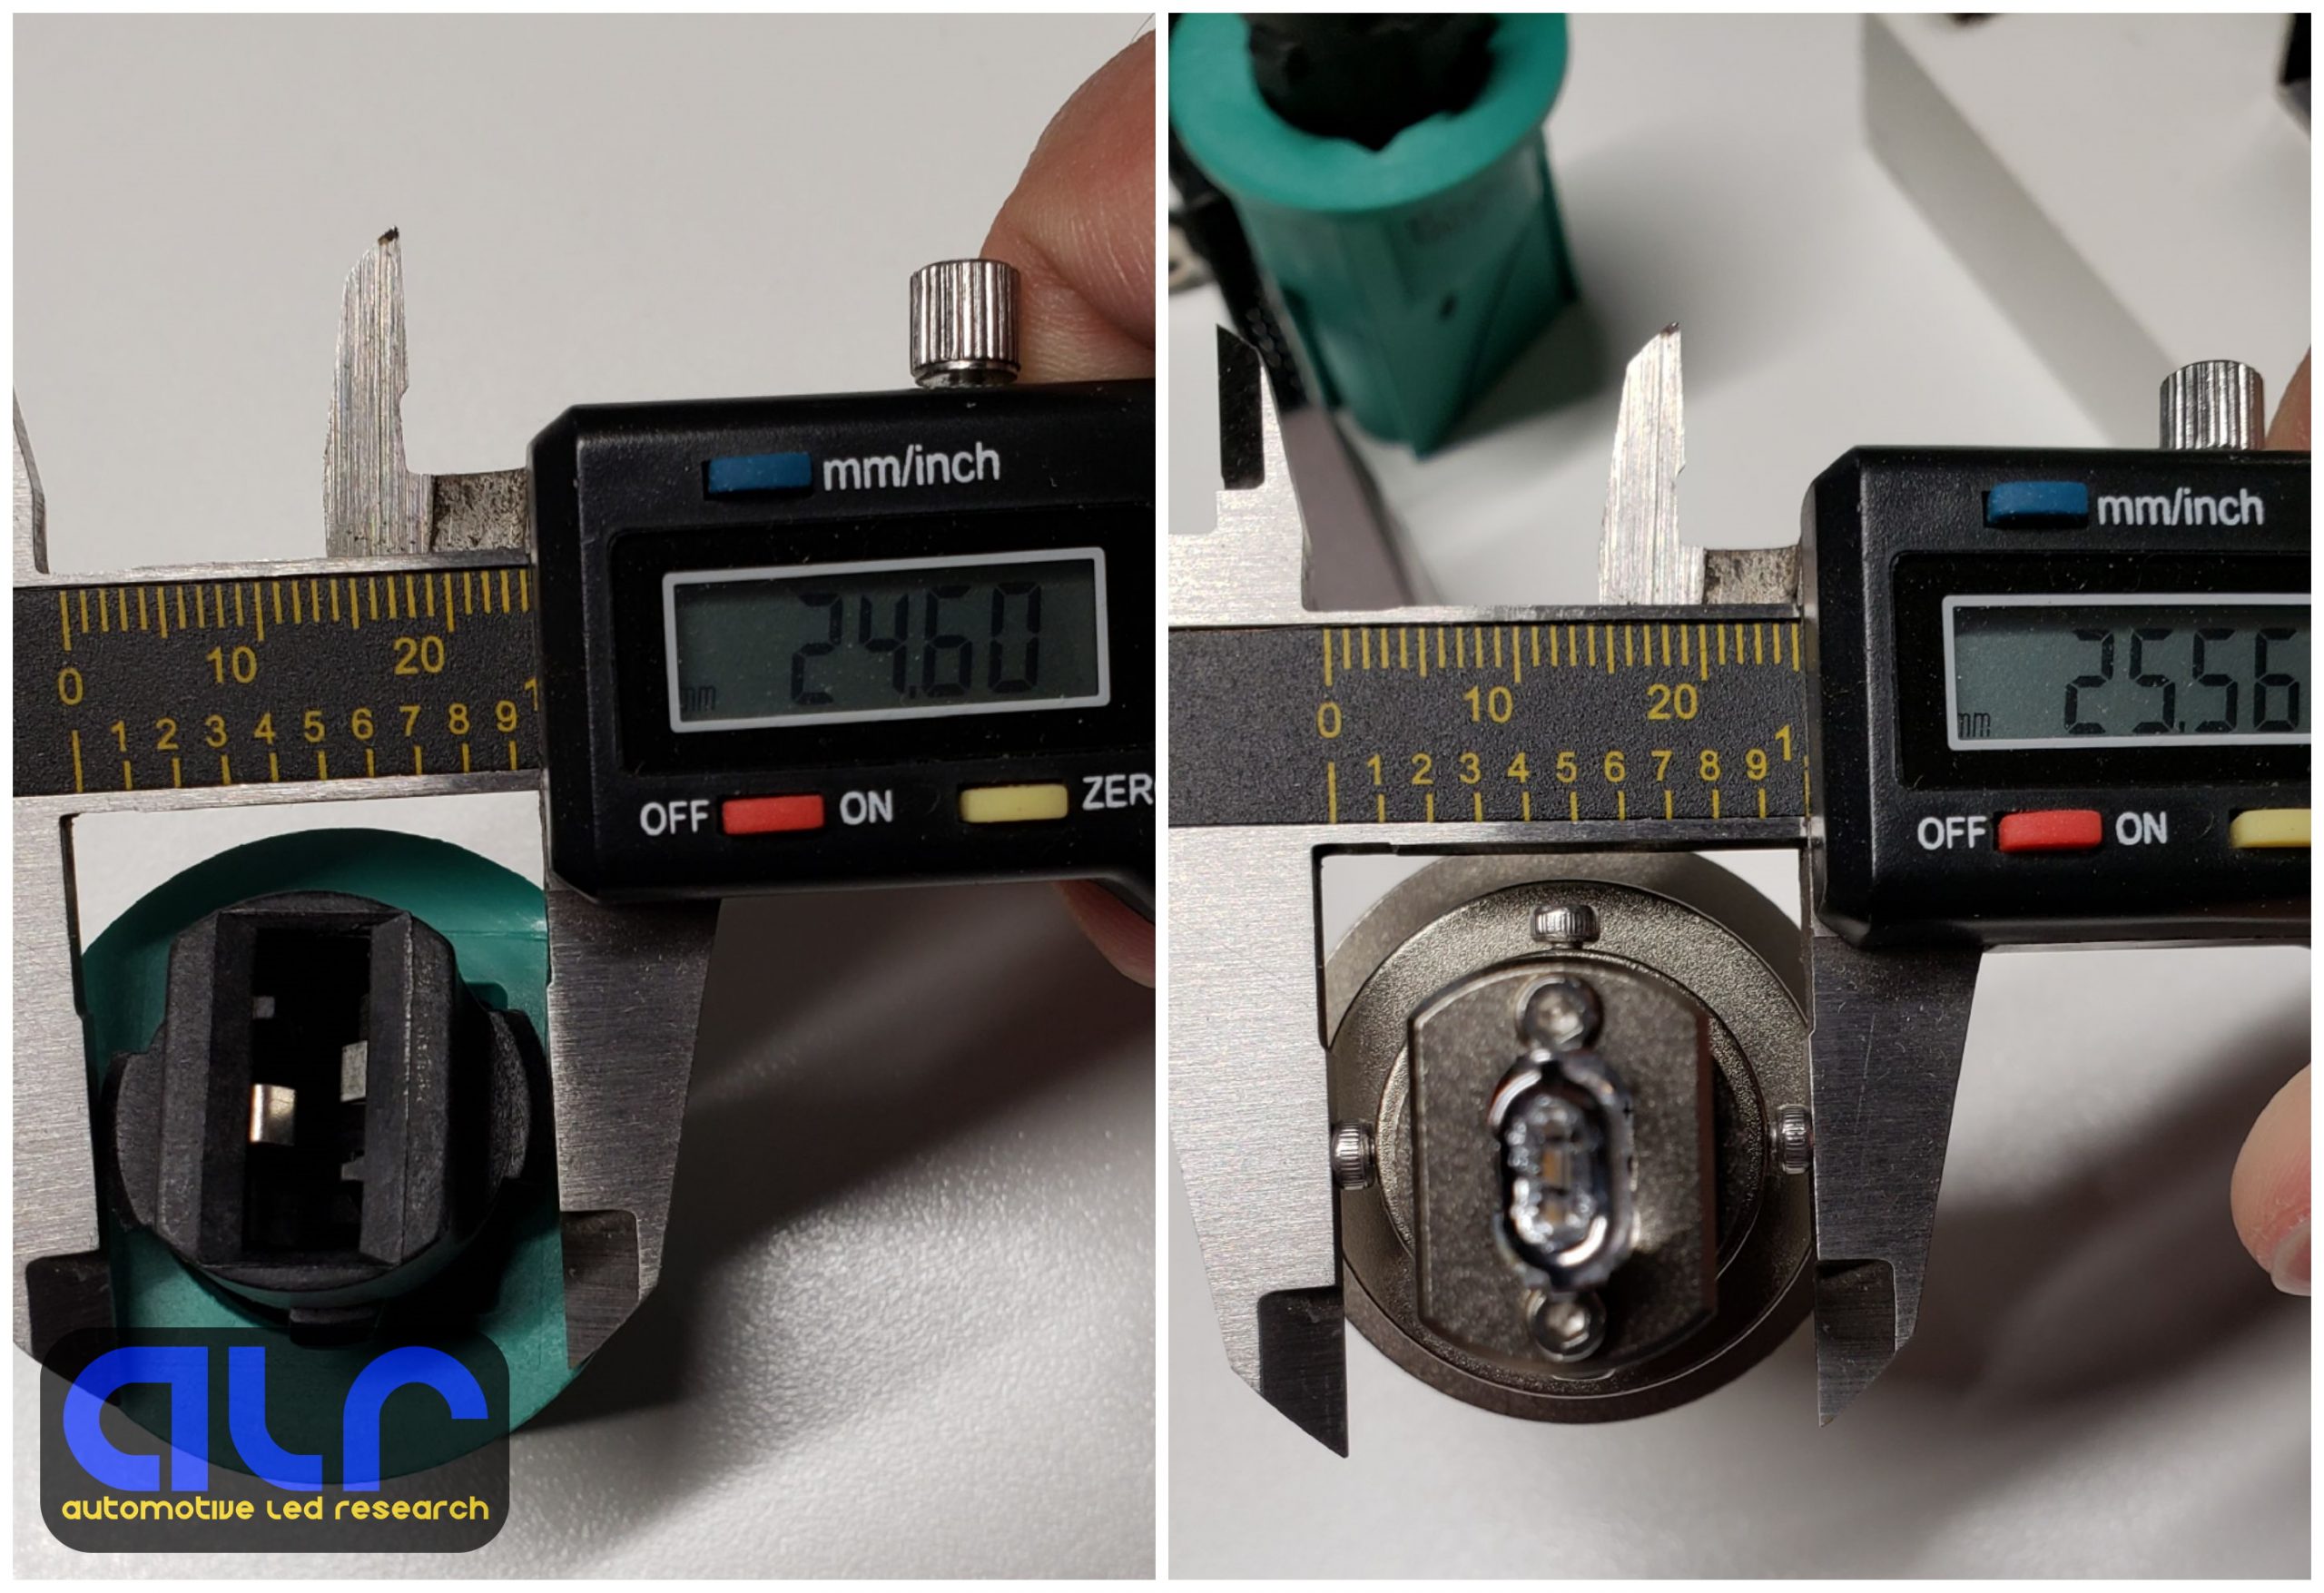
For the rest of the lamps, the heat sink fins on the bulb were just too large in diameter. They were obstructed by contours or brackets in the lamps rear housing that prevented the bulb assembly from fully seating.
Rogue headlamp:
Rogue tail lamp:
Cruze tail lamp:
The lamps that I did have successful fitment were:
-
- 15-17 Honda Accord sedan headlamp
- 16-17 Honda Accord sedan tail lamp
- 19-20 Ram 1500 headlamp
- 10-18 Ram 1500 headlamp
- 16-19 Toyota Tacoma headlamp

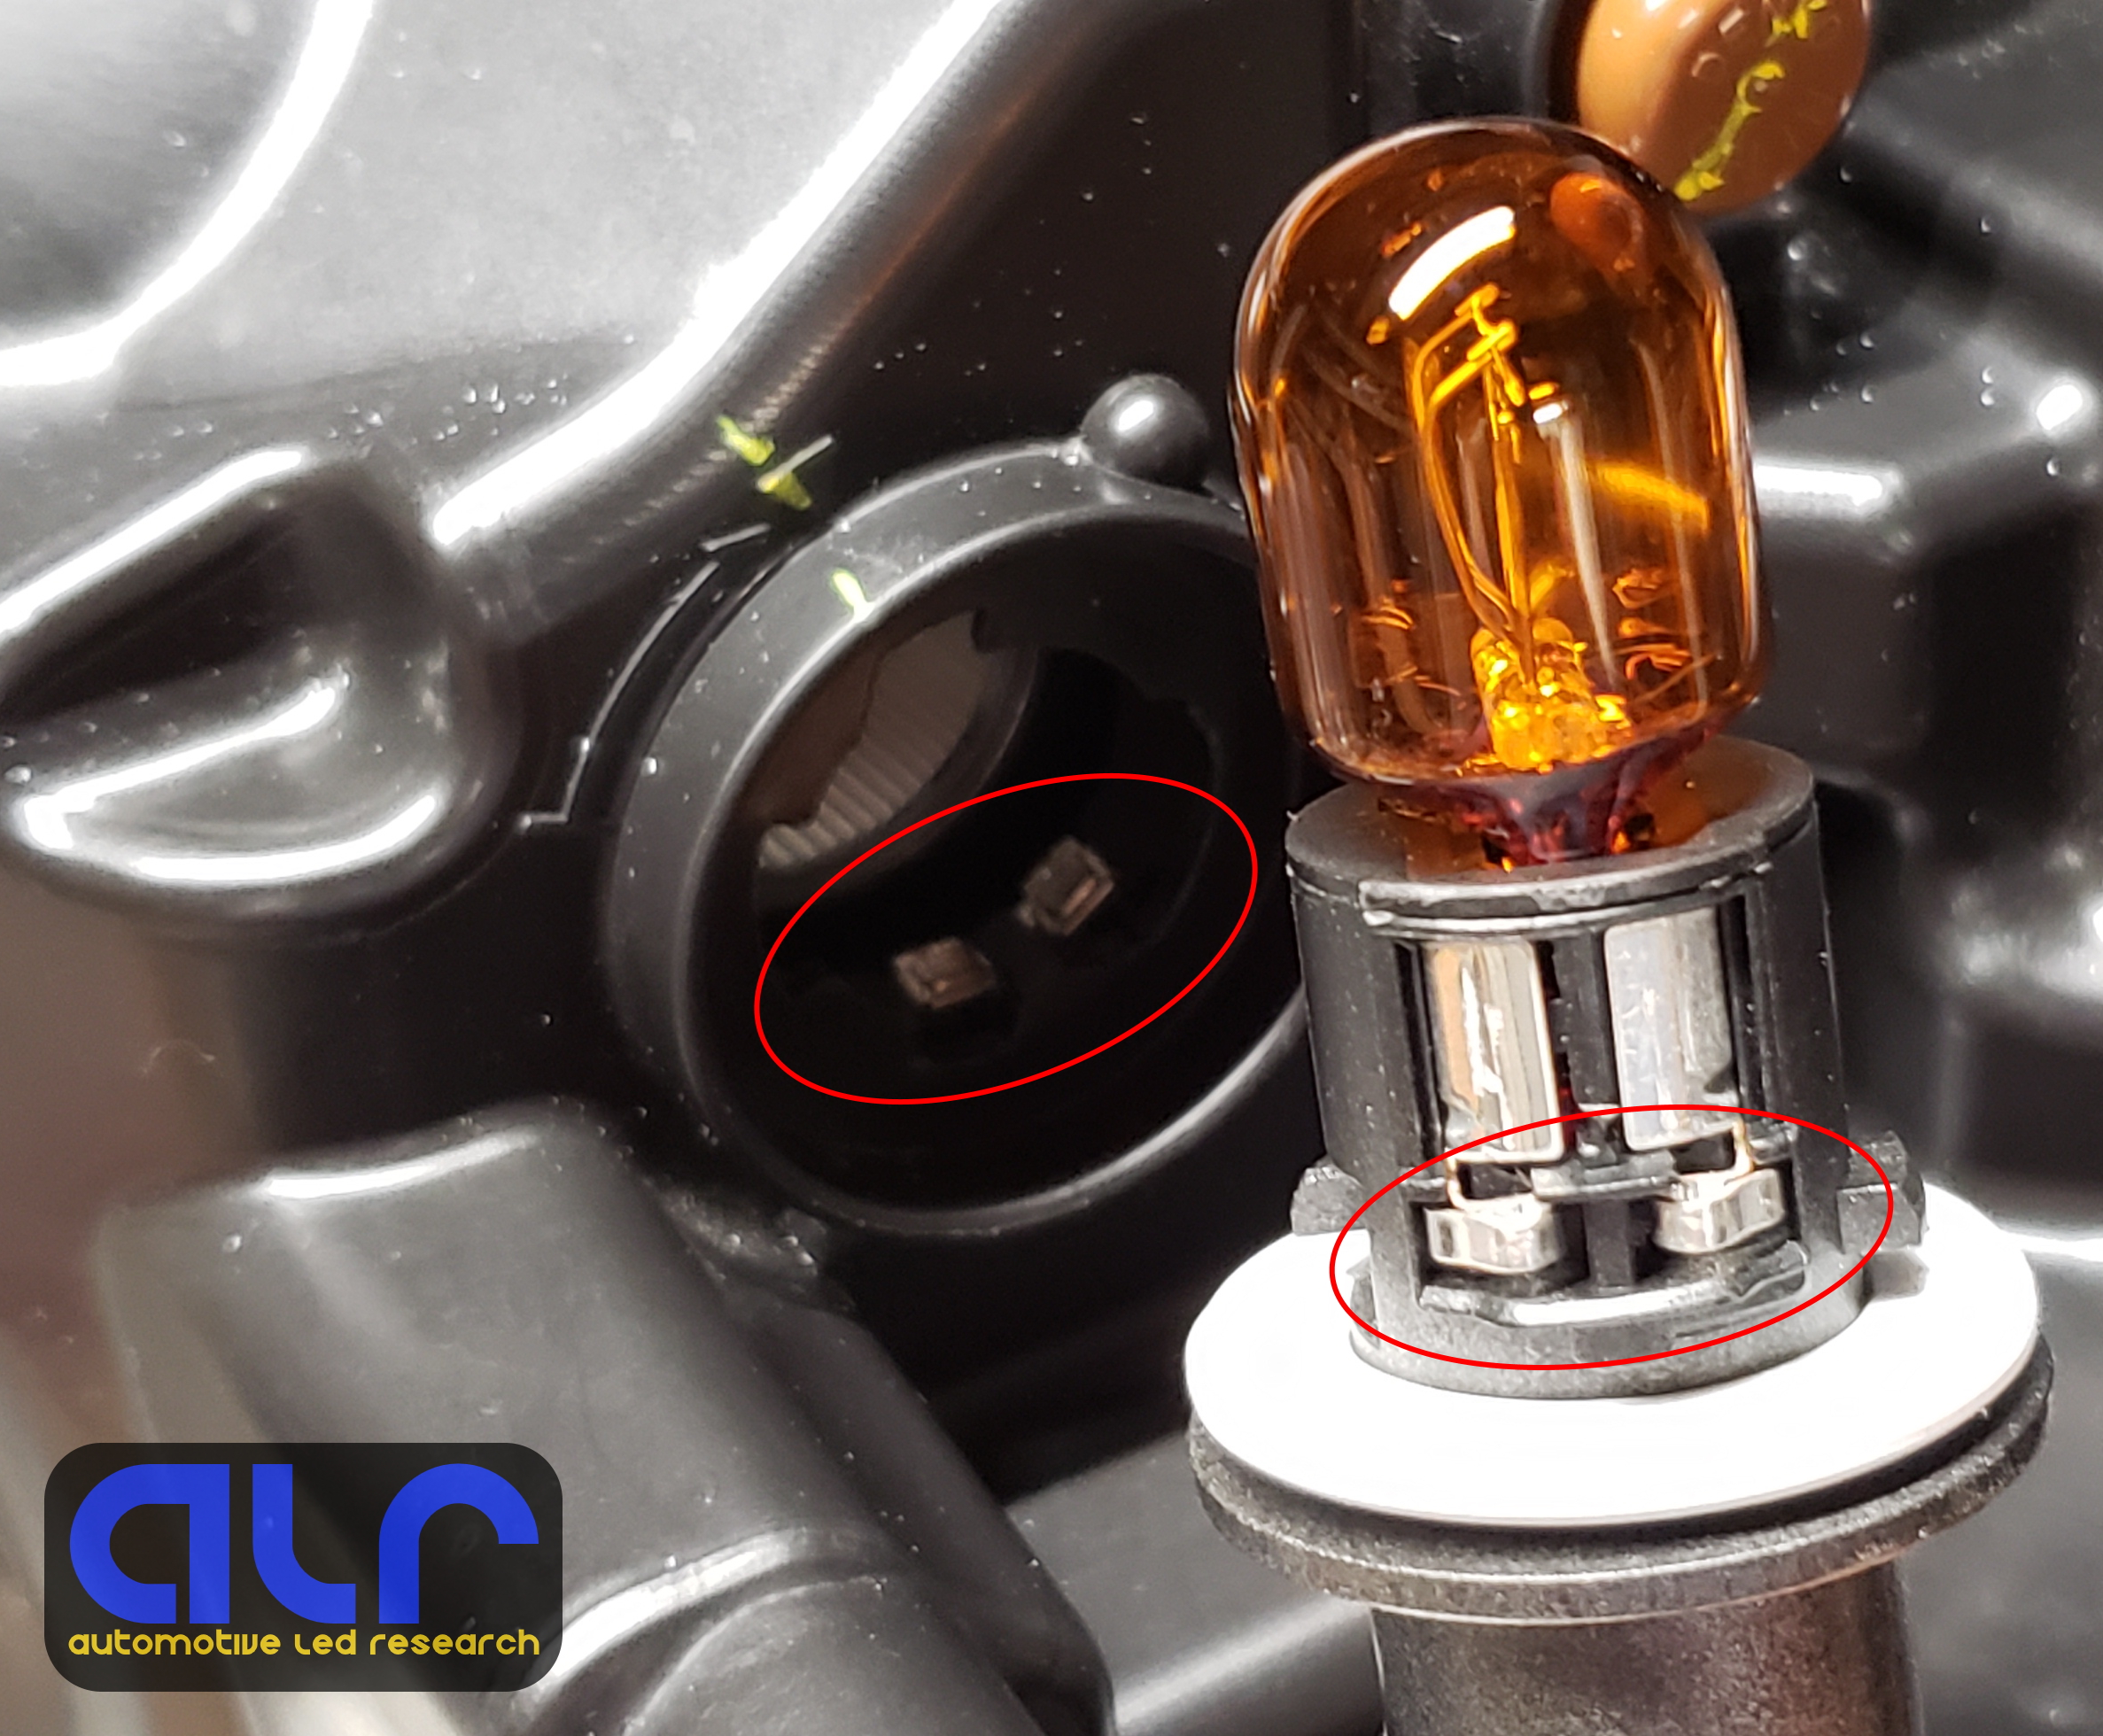
The new Ram headlamp does not use a typical style bulb connector with pigtail wires coming out of the back. Instead the headlamp has an internal circuit built into the socket hole. These electrical contacts route to a main connector on the headlamp that powers all of the bulbs. Because of this unique circuitry (but not entirely uncommon in other cars) the user will need to configure a T20 bulb pigtail and then wire tap into the stock harness in order to power the VF LED. Something to be aware of if your vehicle has a similar style connector.
Light pattern and intensity evaluation continued in Part 3…